
ginger bee farm
Incubation Station
You have your hatching eggs from Ginger Bee Farm or another trusted poultry supplier and now you face taking those little treasures from egg to baby chick. That process is what we cover in this guide.
The information on this page is sourced primarily from Brinsea, who are one manufacturer of incubators and brooding supplies, but, more importantly, have been leading the field of home incubation for decades. We’re not affiliated with the company in any way – we choose Brinsea products and share guidance from their research and experience, but any incubator can hatch a healthy brood of chicks with the right conditions and care. Mother hens, too, have been doing that job admirably for much of agricultural history. A broody mama is a fabulous resource and in some ways can never be replaced by an incubator, but for ease of education and clarity, all the info covered here is intended for home incubation devices.
Starting Strong
Incubator
There are two main types of incubators, still-air and forced-air. Still-air incubators warm the interior environment with a heating element and do not contain a fan. This means that the warmest air rises to the top of the incubator, creating thermal zonation and some temperature inconsistency. Forced-air incubators use a fan to circulate heated air, maintaining a consistent precise temperature throughout. Forced-air incubators are what we prefer to use, but either type will work with proper care. Keep in mind that still-air incubators are usually set a degree or two higher than optimum hatching temperature to account for thermal zonation. Our favorite brand is Brinsea, but ask the chicken-keepers in your community what they have found to be a good incubator for their set-up and budget.
Eggs
Eggs which are less than a week old fare best in terms of hatch rate, and past about 14 days the viability of fertile eggs drops significantly. When storing eggs that will eventually be incubated, shoot for a slightly humid environment between 50°F and 69°F. Turning the eggs once a day will promote healthy embryonic growth. If you can, avoid washing eggs you plan to incubate. Washing eggs removes the protective bloom and some of the egg’s cuticle, which may leave the embryo more vulnerable to pathogens. If you have received shipped hatching eggs, make sure to rest them for 24 hours with the air cell (rounder end) up before incubating them. Place the eggs you want to incubate in your incubator before you turn it on – this avoids temperature shock since the eggs warm gradually alongside the incubator.
Temperature
Temperature is the single most important factor in incubation. You can have a humidity dip, forget to turn your eggs a few days, and handle too frequently, and you’ll still get a respectable hatch. If your incubator temperature isn’t properly monitored, all bets are off.
In a forced-air incubator, the temperature should be kept at between 99.3°F and 99.5°F. In a still-air incubator, the temperature should be set slightly higher, about 100.5°F to 101°F, to account for the varied temperature within. If your incubator has one, ensure the temperature probe or thermometer is sitting at the same level as your eggs. Some people choose to add a small thermometer / hygrometer to their incubators as a precaution in case the incubator’s temperature or humidity monitoring system isn’t sufficiently accurate.
Humidity
Humidity is essential for hatching healthy chicks, especially at time of hatch. Some small-scale poultry producers report that a “dry hatch” (an incubation and hatching period without any supplemental humidity) yields better results, especially for certain egg colors. This assertion is not supported by scientific data – higher hatch rates of fertile eggs occur when relative humidity within the incubator is above 35%, as shown in a 2013 study by Van der Pol et al. in the Poultry Science publication. Unless your incubator is set up in a room with ideal humidity, a dry hatch will not produce a better hatch rate.
Most incubators measure humidity in percent relative humidity, %RH. The ideal relative humidity for days 0 – 18 of incubation is between 40-50%, and 50-60% in the lockdown period from day 18 onward. This extra humidity is often supplied naturally by the hatching process, but the incubator should be carefully monitored to make sure humidity remains consistent.
If your incubator doesn’t have a functioning humidity sensor, you can figure out your incubator’s relative humidity by using dry bulb and wet bulb temperatures. Dry bulb temperature is just that – what a thermometer’s bulb, or temperature sensing portion, measures when it is dry. Wet bulb temperature is the temp measured by that same sensing portion when it is kept wet. Because evaporation is a cooling process, wet bulb temperature is cooler than dry bulb temperature in proportion to how much moisture can evaporate from the wick, i.e., how much moisture is already in the air of its environment.
To find your own wet bulb temperature, you can tape one end of a length of wicking material (like a cotton shoelace) to your thermometer’s probe, then dip the other end into a reservoir of water with a tight fitting lid. Let the setup rest in your incubator until the temperature has equalized, then read the thermometer. You can calculate your incubator’s relative humidity using a calculator like this: https://www.ringbell.co.uk/info/humid.htm.
Turning
Turning fertilized eggs keeps the growing chick mobile, well-positioned, and prevented from sticking to the inside of the eggshell. In an incubator with automatic turning, set the turn interval to every 1-2 hours. If you’re turning manually, turn your eggs at least once a day and not so many times that opening your incubator causes frequent temperature and humidity fluctuations.
Candling
Candling is the process of shining a strong light against the surface of an egg to see embryonic development inside. Opinions on how often to candle eggs vary, from candling every 3-4 days to the set and forget method, where eggs are not candled at any point during incubation. From personal experience, we recommend candling at least once during incubation – it’s never fun to encounter an exploding egg when lovingly checking on your new chicks. If you only candle once, do it at least halfway through the process, day 11 or later.
There is such a thing as candling too often, which causes frequent temperature fluctuations that can harm delicate embryos. Resist the temptation to candle every day, and let yourself have the surprise of just how much your chick has grown in a week. Don’t candle any more often than every 3 days.
During candling, dispose of any clear eggs, which will not have the characteristic web of red veins, and any eggs that have stopped developing. These may present as an egg with a defined blood ring, black staining within the egg, or a dark and indistinct outline with a lack of healthy veins.
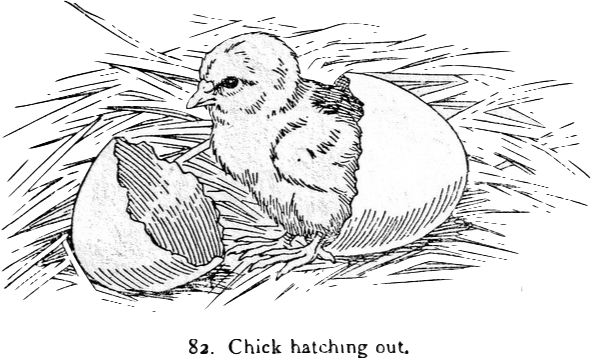
Hatching (Lockdown)
The period immediately before and during hatching is commonly referred to as lockdown because the eggs stop being turned and the incubator stays closed. Lockdown begins on day 18, when the humidity is increased to prepare for newly hatched chicks. Remember to turn off automatic turning if it is part of your incubator, and move eggs from turning trays to the floor of the incubator. As your chicks are hatching, keep an eye out for any that seem to be struggling and intervene when necessary.
Newly hatched chicks should stay in the incubator until they’re dried off and vigorous. New chicks receive all the nutrition they need from their yolk, which they are still absorbing for a full day after hatching. New chicks should have a clean, dry environment to transition into. They need a VERY shallow water dish or waterer and a chick-appropriate starter feed. In a pinch, you can soak starter pellets to make them accessible to new-hatched chicks.